How to Use Stair Nose
Stair nosing is utilized to complete staircases that have designed wood or cover flooring introduced. Stair Nosing are not just add an alluring completion to the edge of each progression where it changes to the following, yet they additionally further develop wellbeing by tenderly extending the progression. A stair nosing strip, otherwise called an edging strip, is a piece of metal or plastic that covers the edges of steps that may not be covered by a planned adjusted edge. Numerous stairs nosing is L-formed, folding over the front edge of the stair track and down over the riser, the upward board just beneath the track. Nosing gives the stairs a finished look and shield the edges from harm. These likewise help shield feet from moving off a stage by offering a non-slip surface and a small edge. Due to its solidness, slide obstruction, and capacity to blend in with a scope of stair tones and styles, normal fiber is a famous stair track cover. Sisal is a hemp-like plant that is utilized to make ropes, twine, footwear, and materials, making it an ideal stair track material. Clear non-slip strips are a tacky plastic that can be applied straightforwardly to hardwood stair tracks. These give security without hindering the perspective on the wood. Clear track strips are generally presented in sets with a little handheld roller apparatus for straightening and clinging the strips to the tracks. Measure the length of every stair with a measuring tape. Assuming one or the two sides of the means are open, just lay the nosing set up and note where you need to cut it. Mark the nosing, then, at that point, slice it to length utilizing a hacksaw or tin cuts depending on the situation.
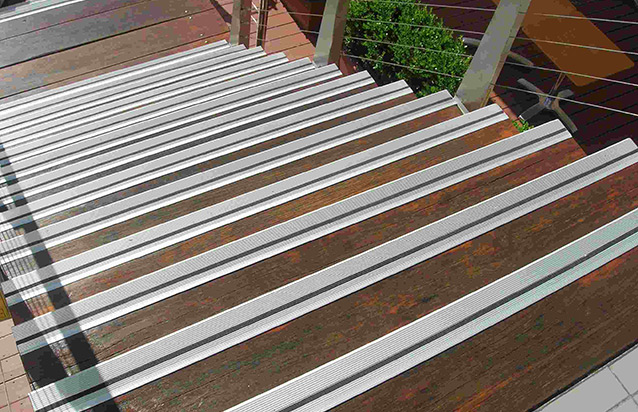
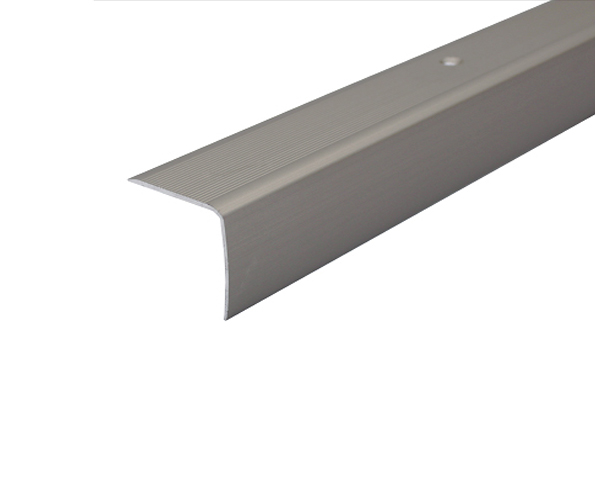
Be careful not to leave metal burrs along the cut edge of Aluminium Stair Nosing. Utilize a metal record to eliminate burrs and smooth the edge if vital. Place the strip safely on the side of the stair track to really take a look at the fit. In the event that your strip has a bended side, it will go on the stair's top the track. The level side of the stair with the nail openings will lay on the riser. Ensure the nails will actually want to infiltrate strong wood. Where the nails go on most wood ventures, there is strong wood, yet at the top advance, there might be layers of ground surface, underlayment, and subflooring. Subsequently, the contact point probably won't have been the strong wood of a riser or even strong hardwood flooring, yet different sorts of ground surface, wood subflooring, or underlayment, which won't hold the nails appropriately on the off chance that they are passed straight through. The best strategy to test this is to solidly drive a nail into the strip's openings, then, at that point, eliminate the strip. Where the nails hit the wood, you'll notice spots. Working from one finish to the next, nail the nosing strip set up. Drive the nails straight in assuming there is strong wood behind the strip (evenly). In any case, push them at a limit of 30 degrees descending point. The nail heads may not sit flush with the nosing assuming the point is excessively steep.


Comments
Post a Comment